


Market Leaders in Battery Cleaner Manufacturing
Cleaning your car battery terminals is a simple DIY task that can save you from a dead battery and a costly tow. It's a key part of routine vehicle maintenance that anyone can perform with a few basic tools and a good battery cleaner. Following a safe and systematic process is essential to avoid electric shocks, damage to your vehicle's electrical system, and contact with harmful chemicals.
Before you begin, gather your supplies: a battery cleaner (either a commercial product or a baking soda and water solution), a wire brush or a specialized battery terminal brush, safety goggles, rubber gloves, and a clean rag. Safety is the top priority. Always wear your gloves and goggles to protect your skin and eyes from the acidic corrosion. Ensure your vehicle's engine is off and the keys are out of the ignition.
Step 1: Disconnect the Battery. You must disconnect the battery before you start cleaning. The correct order is crucial to prevent a short circuit. First, use a wrench to loosen the nut on the negative (black) terminal and slide the cable off. Then, repeat the process for the positive (red) terminal. Always remove the negative cable first to prevent an electrical arc if your wrench accidentally touches the vehicle's metal frame.
Step 2: Inspect and Apply the Cleaner. Once the cables are disconnected, inspect the terminals and clamps for the extent of the corrosion. Now, it's time to apply your battery cleaner. If you are using a commercial aerosol spray, follow the manufacturer's instructions. A foaming cleaner is often the easiest to use as it clings to the terminals. If you're using a homemade baking soda paste, apply it generously to the corroded areas with an old toothbrush. You will likely see a bubbling or fizzing reaction, which is a sign that the cleaner is neutralizing the acid.
Step 3: Scrub the Corrosion Away. After the cleaner has had a few minutes to work, use your wire brush to scrub the terminals and the inside of the cable clamps. The neutralized corrosion should come off relatively easily. Continue scrubbing until the metal is clean and shiny. A specialized battery terminal brush is ideal because it has a rounded wire brush for the inside of the clamps and a tapered brush for the battery posts, ensuring a thorough clean.
Step 4: Rinse and Dry. Once you have scrubbed all the corrosion away, use a small amount of water to rinse the terminals and clamps. Use a clean rag to dry everything thoroughly. It is important to ensure the terminals are completely dry to prevent future corrosion and to ensure a solid electrical connection.
Step 5: Protect and Reconnect. To prevent future corrosion, apply a thin layer of a battery terminal protector, petroleum jelly, or dielectric grease to the cleaned terminals and clamps. This creates a protective barrier that seals out moisture and acid vapors. Now, reconnect the cables in the reverse order: positive terminal first, then the negative terminal. Ensure the connections are tight and secure. Your battery is now clean, protected, and ready to deliver peak performance.
Categorias
Leia mais
The Vacuum Forming Machines Market is experiencing strong global momentum as industries turn to efficient, cost-effective plastic forming methods. Dataintelo’s latest research reveals the market is projected to reach USD XX billion by 2032, growing at a CAGR of XX% from 2024. This upward trend reflects increasing demand for customized plastic components across packaging, automotive,...

The Residential Standby Generators Sales Market is experiencing steady expansion as growing concerns over power reliability and increasing instances of natural disasters push homeowners to invest in backup power solutions. As per Dataintelo’s latest market intelligence report, this sector is witnessing a consistent rise in global demand due to heightened awareness about uninterrupted...

The Skin Lightening Soap Market is witnessing a significant surge in demand as consumers around the world place increasing emphasis on skincare, personal grooming, and complexion enhancement. This trend is especially prominent in regions where lighter skin tones are often associated with beauty, social standing, and confidence, leading to a rise in the consumption of skin lightening soaps....

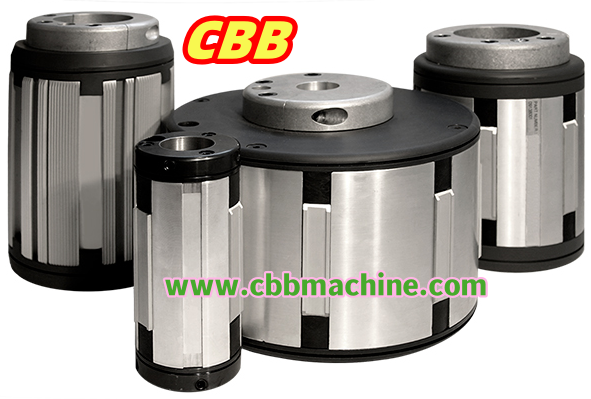
For industries that rely on accurate core engagement and consistent torque transmission, the Mechanical Expand Chuck from Cbbmachine brings a practical and robust approach to core holding. It is engineered for smooth integration into various web handling systems while reducing maintenance effort and improving operational stability. This type of chuck uses a mechanical expansion mechanism,...
The Financial Services Market is undergoing a significant transformation driven by rapid digitization, shifting consumer expectations, and evolving regulatory frameworks. As global economies recover and adapt to new financial ecosystems, the demand for innovative, secure, and accessible financial solutions continues to accelerate across developed and emerging regions alike. Dataintelo’s...